Overview
Safesend is a service that allows you to manage your client's outbound relay. If you're just utilizing Cloudfilter, you would not be able to add outbound rules, manage other user's outbound quarantines, enforce outbound TLS, and many more options. Enabling SafeSend allows a manager to adjust all of these settings for a domain.
This article will cover:
- How to turn SafeSend on
- Guides on how to configure the outbound relay in the console
- SPF record values to add
How to turn SafeSend on
If you are a Manager with administrator role permissions, you will be able to enable SafeSend in the console for any domain.
To enabled SafeSend you will:
- Navigate to the Mailprotector console at https://emailservice.io
- Navigate to the domain you'd like to enable SafeSend for
- Select the products flow chart on the "Overview" page
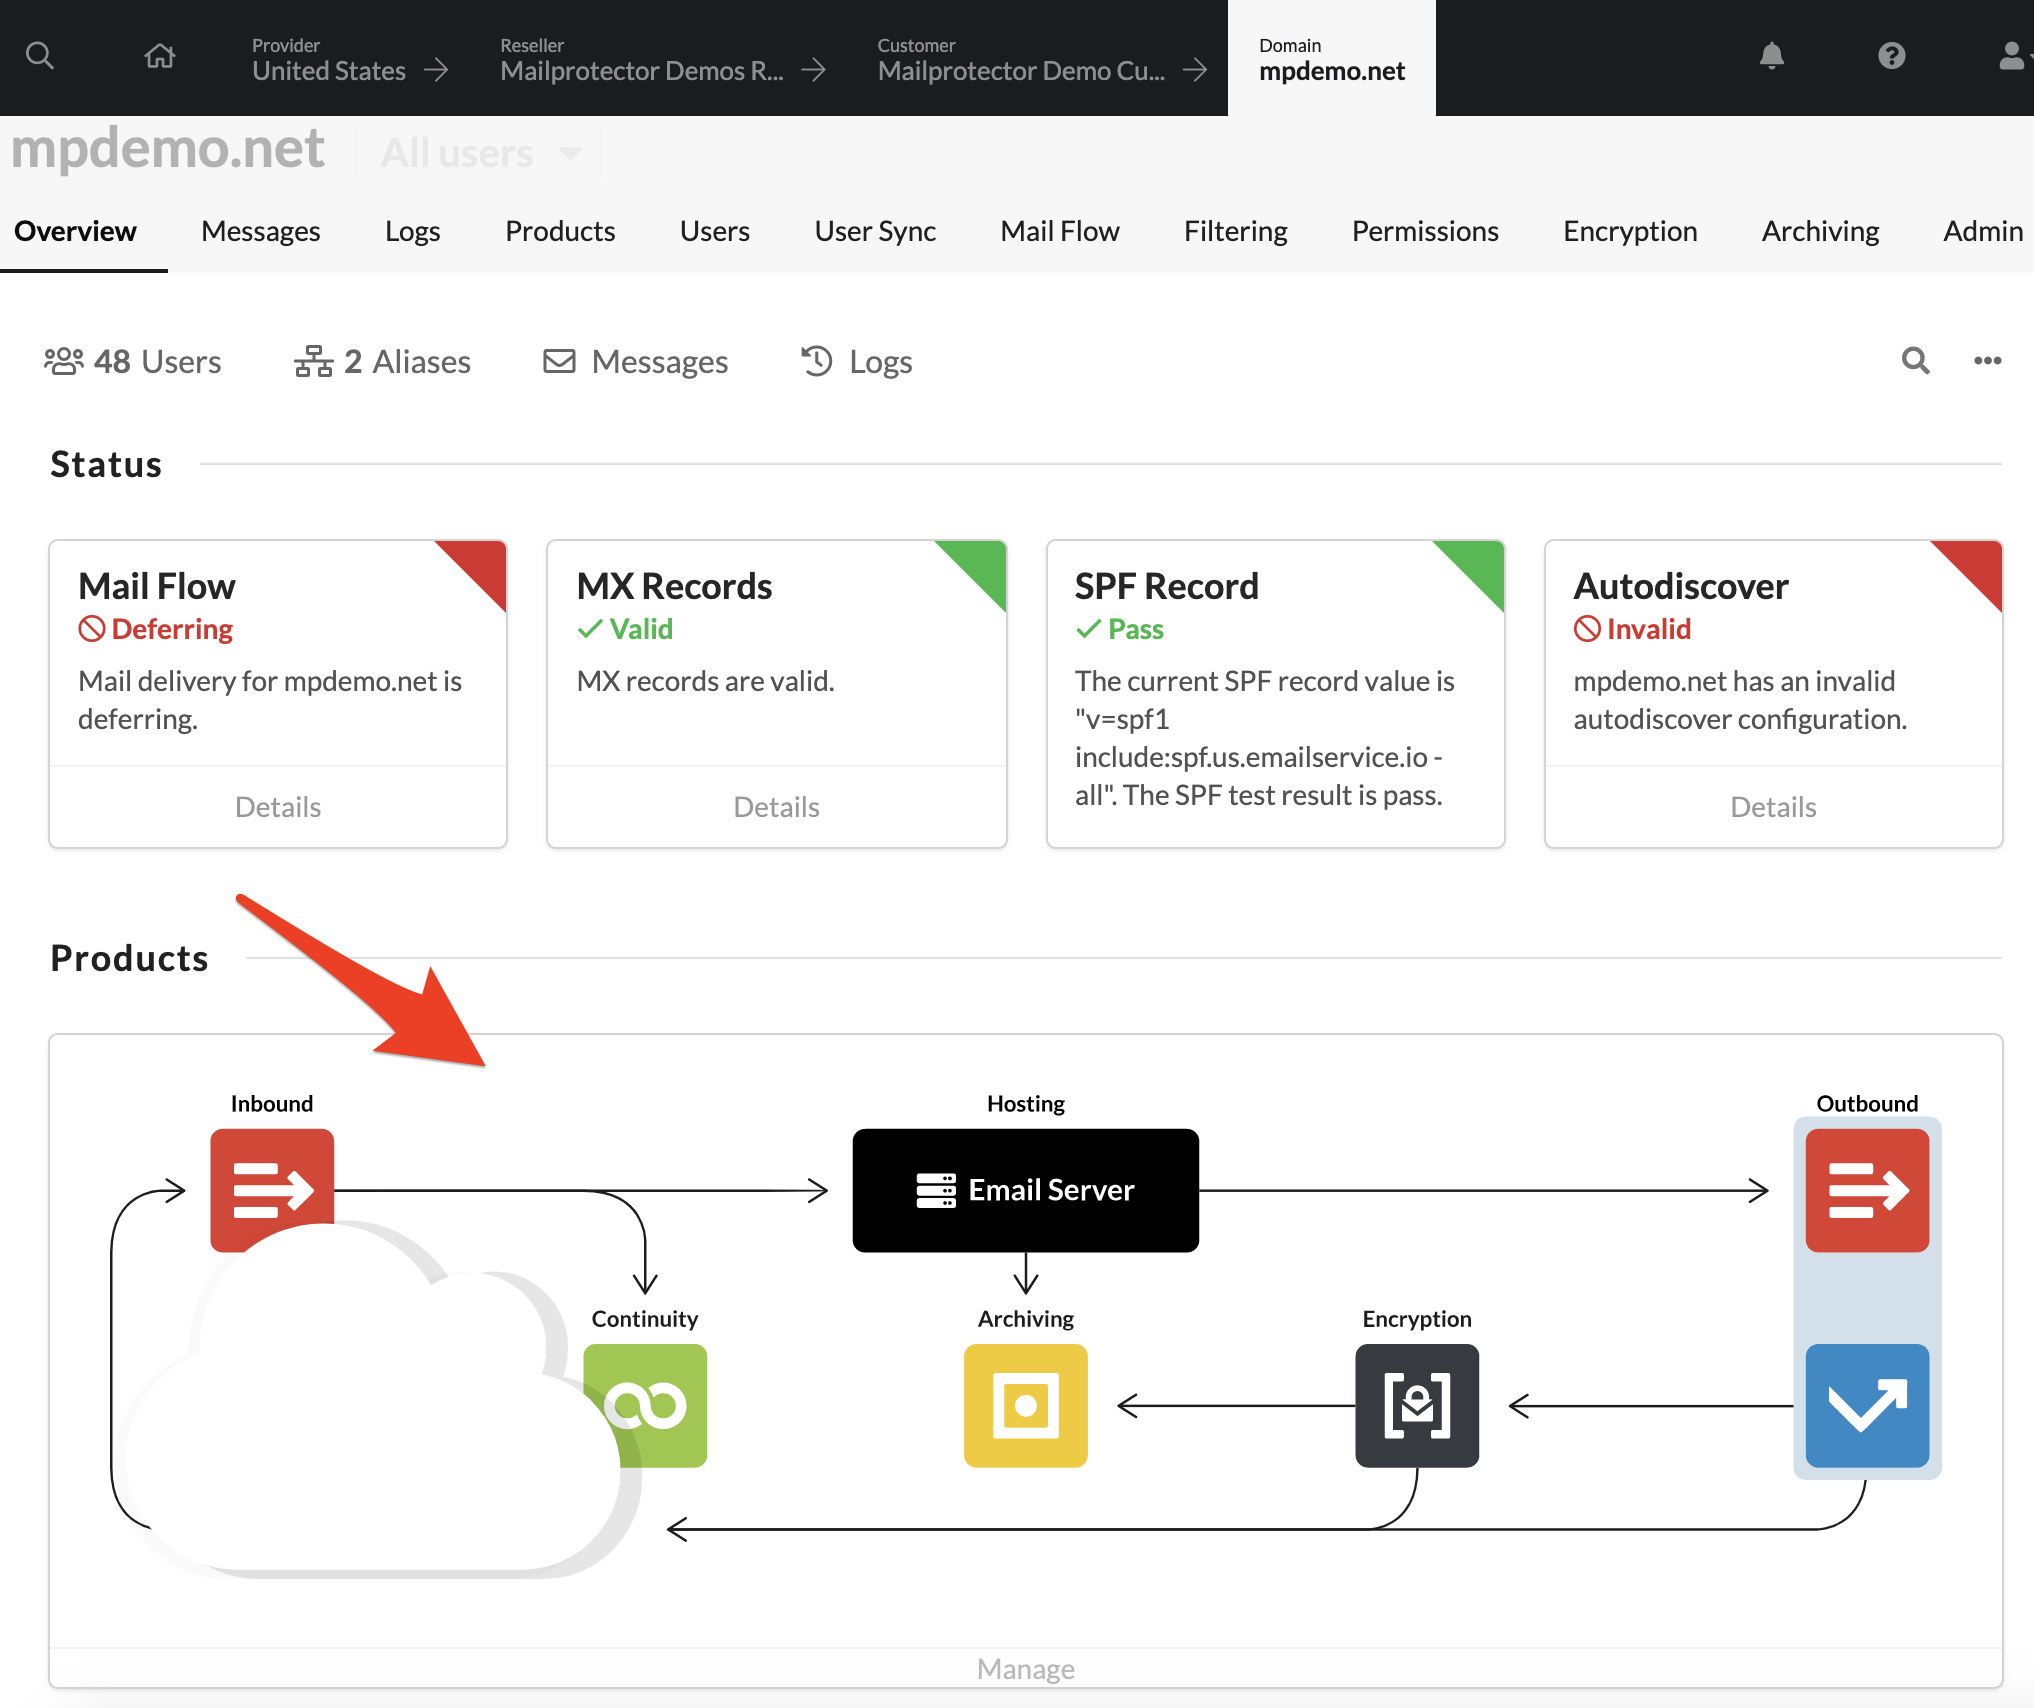
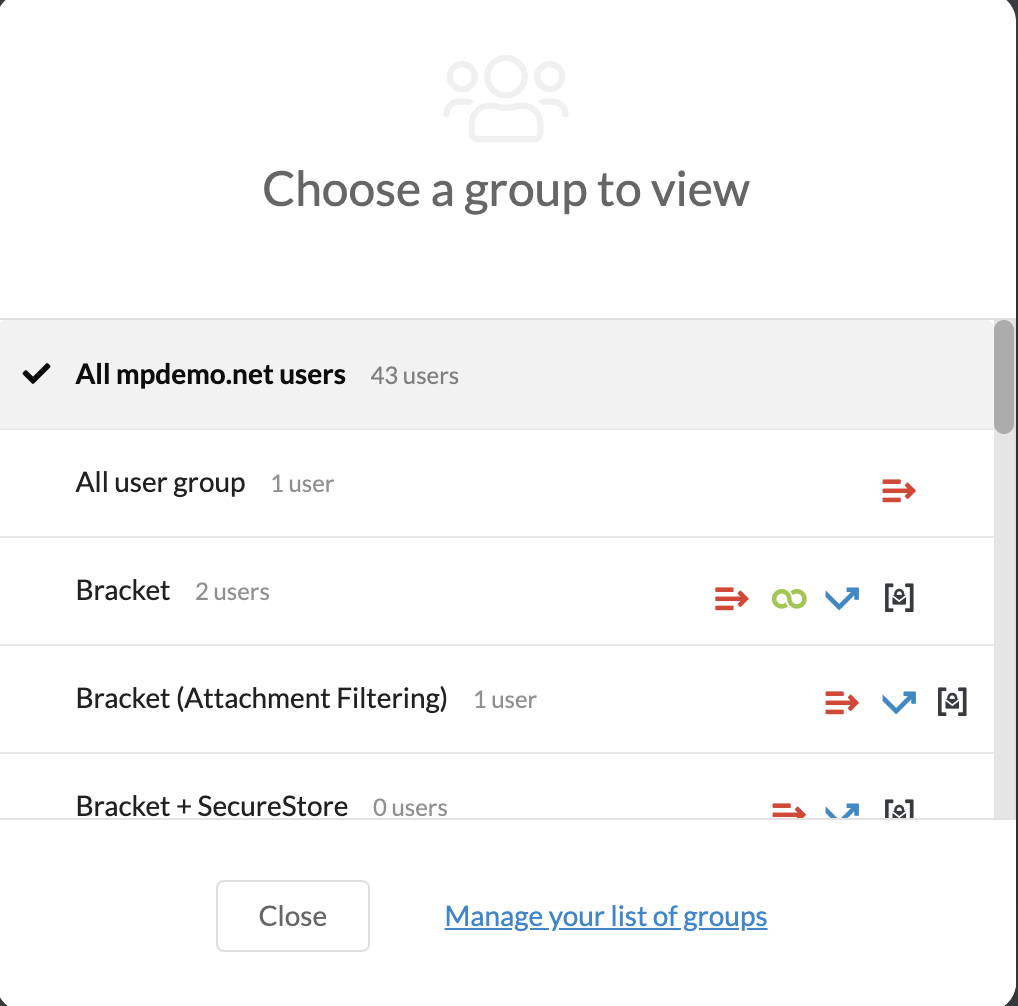
- If you have multiple groups, choose which group you'd like to manage.
- Select the SafeSend icon and choose "Update"
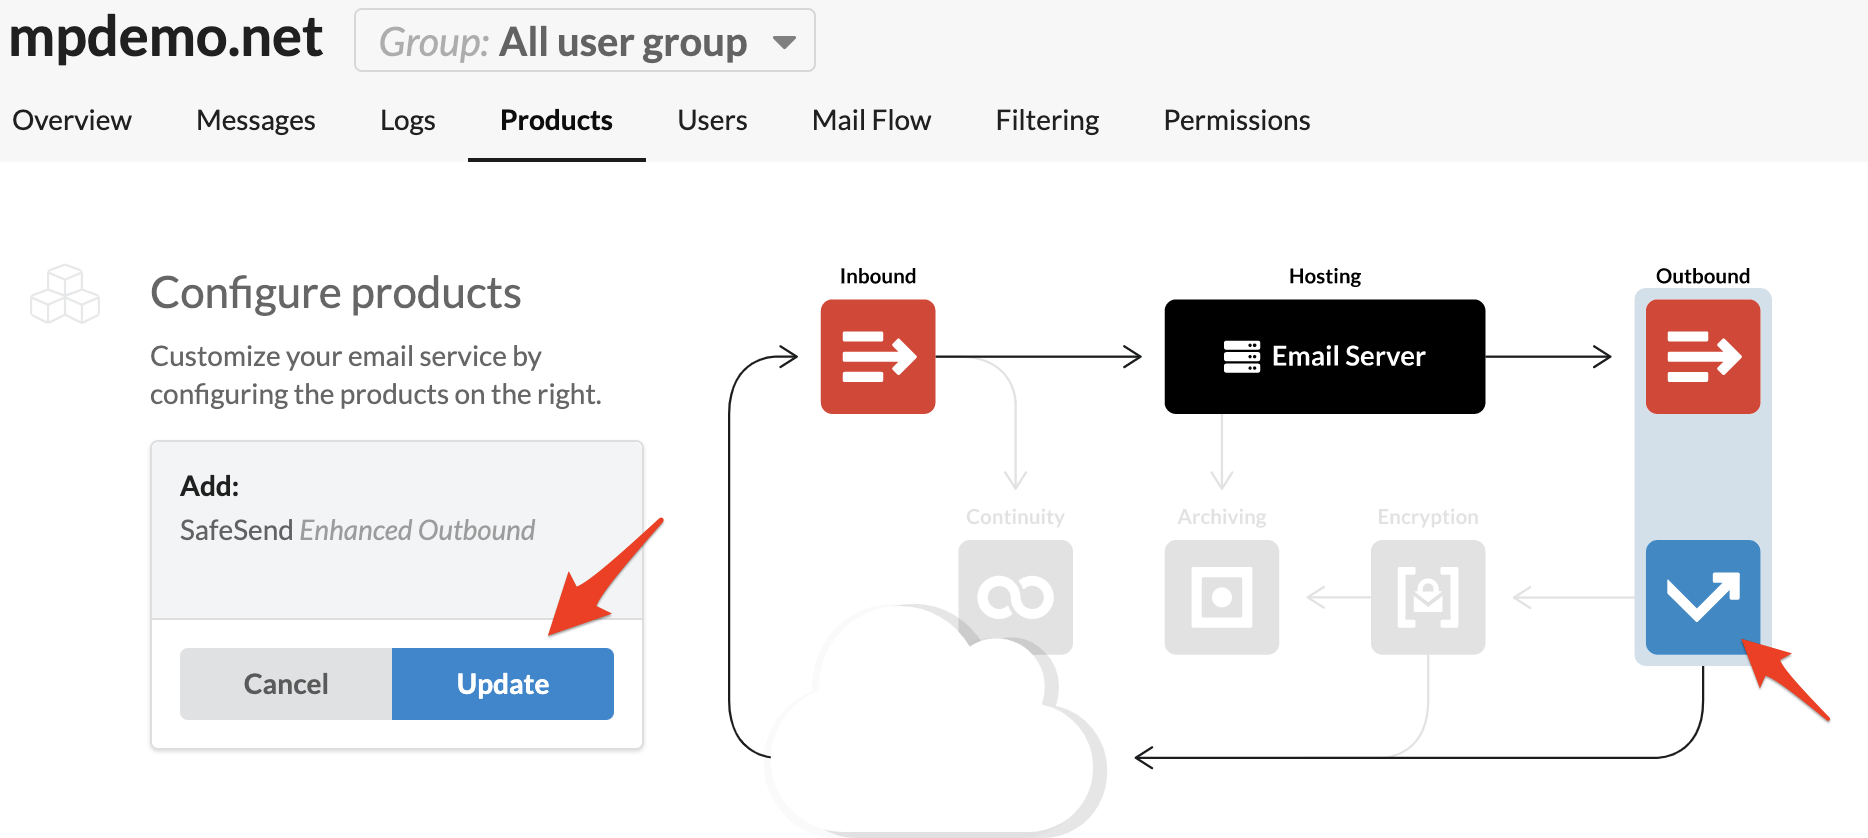
Once enabled, you will see the SafeSend button listed in your Active Products and all users in this SafeSend Domain and/or User Group will instantly have the following available features:
- Compliance Footers
- Content and Policy Controls
- Outbound Quarantines
- Forced Outbound TLS Message Rules
Guides on how to configure the outbound relay in the console
The Outbound SMTP Host Address is the outbound public IP address of the mail server relaying to Mailprotector. It is important that you enter this address correctly.
NOTE: This IP address is typically the same IP address as the Inbound SMTP Host Address but could be configured on a different public IP. You will need to verify this by checking the server or firewall configuration.
NOTE: Outbound SMTP Host Addresses for Office 365, G-Suite, and Intermedia are preconfigured by Mailprotector. Here are articles that cover configuring outbound email for our most common platforms:
To navigate to the outbound email sources you will:
- Log into the Mailprotector console at https://emailservice.io
- Navigate to the domain you'd like to manage
- Select the "Mail Flow" tab
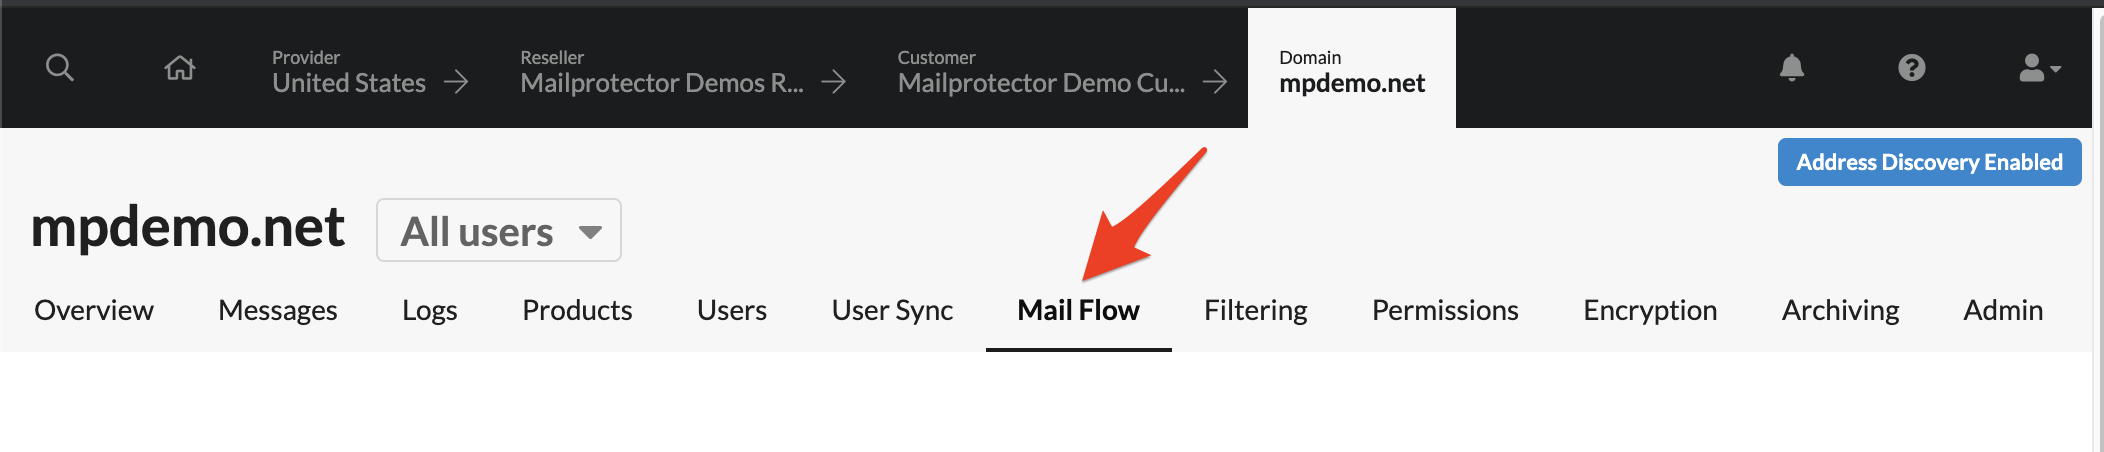
- Scroll down to the 3rd section labeled "Outbound Email Source IPs"
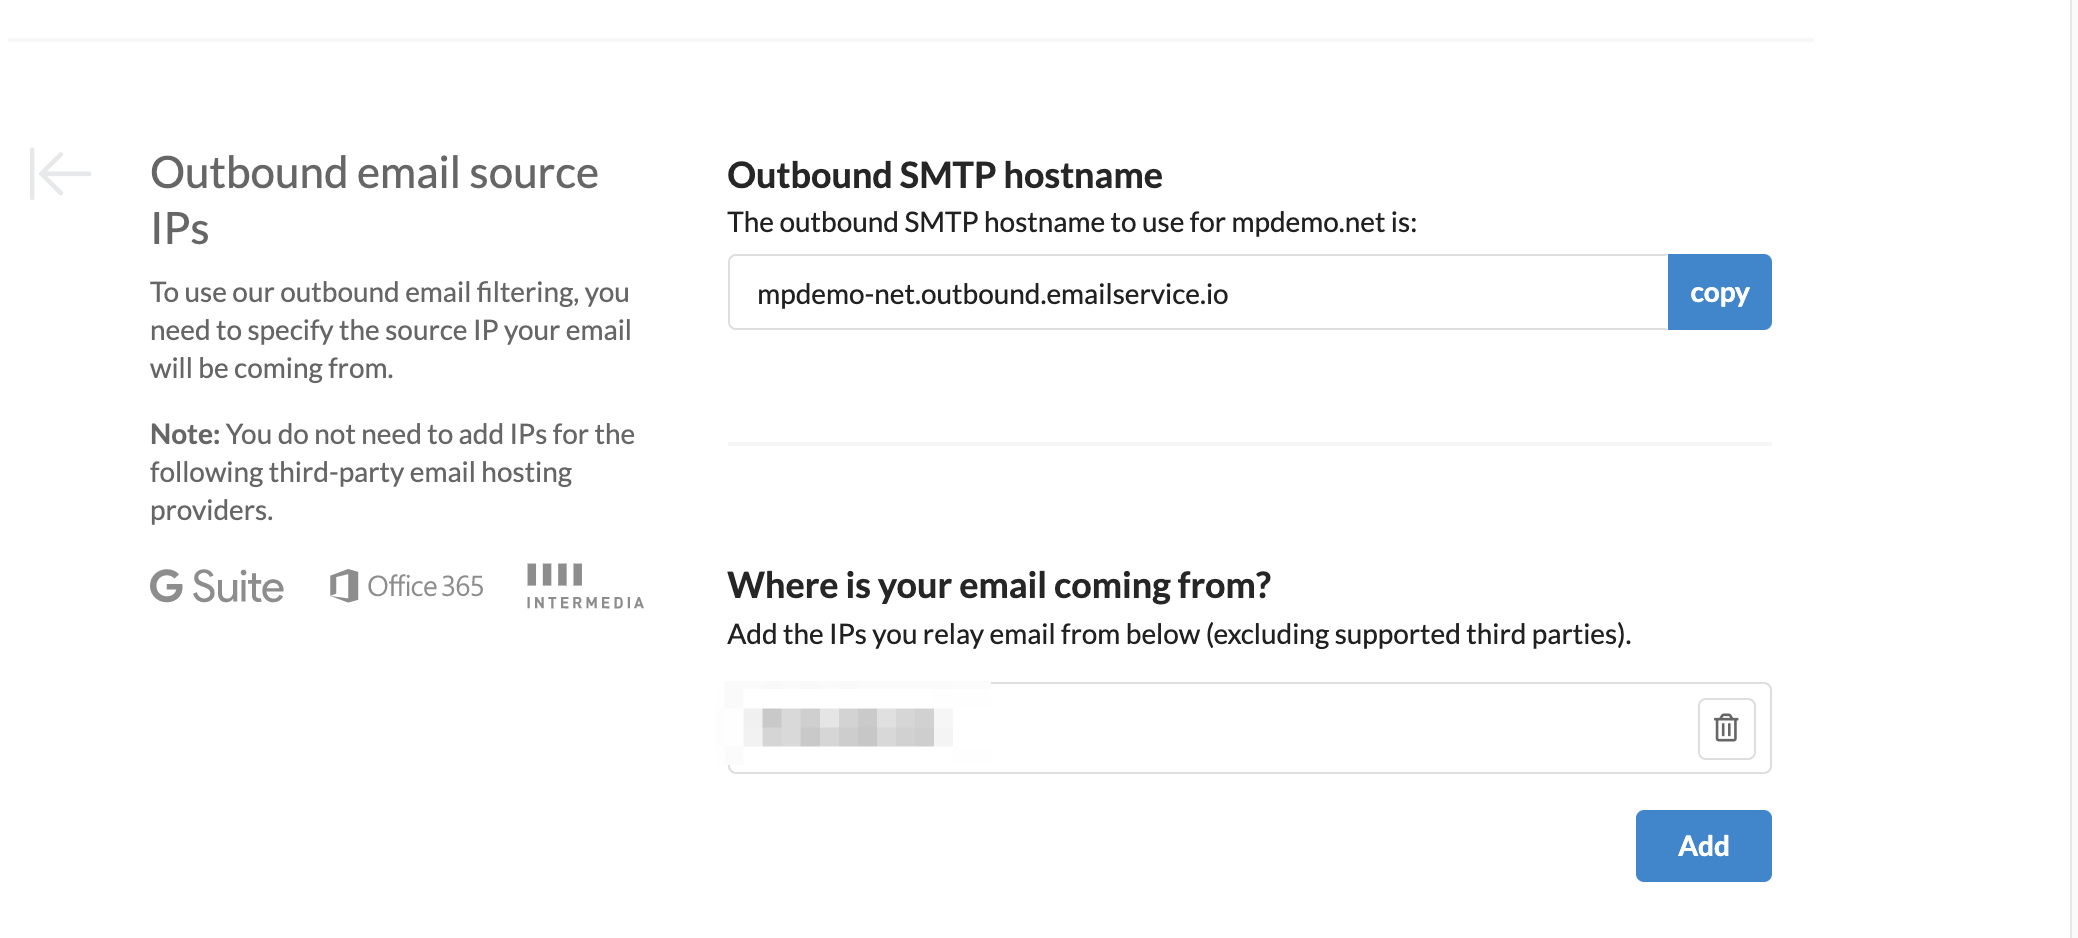
Once you're here, you can input the IP address your email will be coming from if it isn't from G-Suite, Office 365, or Intermedia.
This is also the area where you will locate the "Outbound SMTP Hostname" to point the outbound connectors, mail routes, and relays to.
SPF record values to add
Implementing SPF for outbound email delivery will tell the world where your outbound email is authorized to come from. This is necessary to have in place so that emails coming from a user's domain aren't put into the spam folder of recipient's mailboxes
You can find the information for SPF records in the console, or you can also look at the "Add SPF Records article" for specifics on regional syntax.
The console has a clickable button under the "Overview" page of all domains. 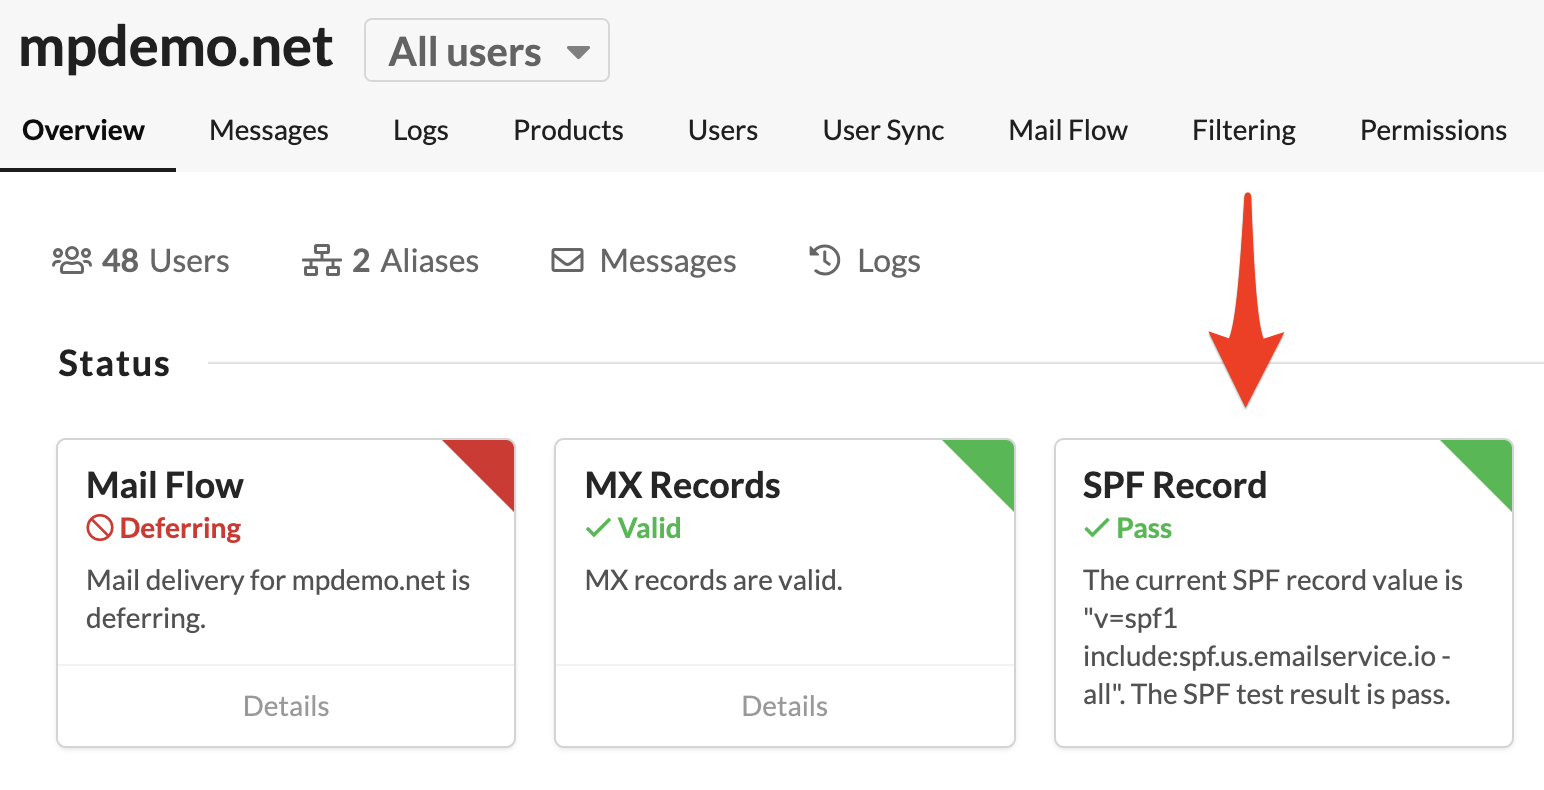
- SafeSend.pdf500 KB
Updated